
Last Updated: 5 years ago
An underestimated segment of video production is the creation of a screen recording (or many). These can be used in a variety of ways – to demonstrate a new app, to create a walkthrough of a new website, to help with web product training, and more. These aren’t just used alone, as well – screen capture can be integrated into animation and live-footage to create a really beautiful piece.
We have collected here the steps one should take to capture the best screen recording. We will cover:
1. Getting to grips with the desired outcomes
2. Screen Recording Techniques
3. Using Icons / Animations with Your Screen Recordings
4. Voice-Over Usage
5. Additional Tips
Desired Outcomes
The first step to capturing an accurate screencast actually revolves around communication. Make sure to speak with the client to determine the learning outcomes that you need to achieve. Then you can determine the best way to meet these outcomes with the visual aids. This is especially important when you are combining the screen capture with other assets, so you have a big-picture of what the end project will look like and accomplish.
We also strongly recommend being transparent and educating your client about the process. This way, they know the limitations involved with screen recordings (they are not necessarily animations) and why certain steps may take longer than others.
Educate yourself about the app or website you’ll be recording. Being able to easily find what you need and move through the software will help the screen recording go smoothly and look much better in the long run.
Audiences retain information better when there are key visual images associated with the data, so the key visuals need to be aligned with the main learning outcomes. Possible visuals might take the form of animated icons overlaid on the screen capture, as we have found this to be a useful tool to audience retention.
It’s important that a script and any additional visuals are determined before the screen capture stage. Screen capture can be a time-consuming process, so knowing exactly what you need to record will save you time and a lot of back-and-forth.
The Screen Captures – Techniques
The most important thing about screen recordings – because if done poorly, they can be very boring – is to provide a clean, clear recording with good pacing. If it’s too fast, people won’t be able to follow what’s being done, and if it’s too slow, they will tune-out.
If you choose to add text, icons, or animation (covered in the next section) with your screen recordings, keep these in mind – you won’t want these assets to cover anything crucial within the screen.
You may choose to utilise a simple zoom to highlight key features. These would be done in post-production, but again this is something you would accommodate in the screen recording. For example, if we’re talking about entering figures into the appropriate part of a spreadsheet, you would first show the whole screen, so the audience knows where to find the appropriate box, then slowly push in (in post production) to show the information entry box in more detail. This will better enable the audience to see the information written around the input box, and to watch as data is being entered. You may need to record additional time in this segment of your screen capture to accommodate the zoom.
Then we would slowly zoom back out to reveal the box in the context of the whole page.
You may also consider use a small, coloured animation to appear on the pointer when the mouse is clicked. This makes the viewer aware when you click into a cell to make changes, and how you’re navigating around the model.
Using Icons in Your Screen Recordings
If you are creating a tutorial or walk through, you may consider breaking down the video(s) into chapters. For example, if you are making a series of videos revolving around a specific learning outcomes, a visual aid can help trigger retention in your viewer.
For example, if one of the main learning outcomes is that the software / app can help with saving time when planning, you may want to use an animated icon of a clock and a calendar. This animated visual image would be a break from the screen captured recording. It might be used full-screen as the introduction for a chapter and then reduced in size, but kept on-screen in the top right or left corner as a watermark for that chapter. This helps to visually highlight the key information for the whole chapter.
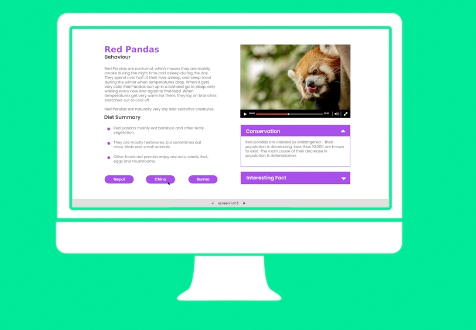
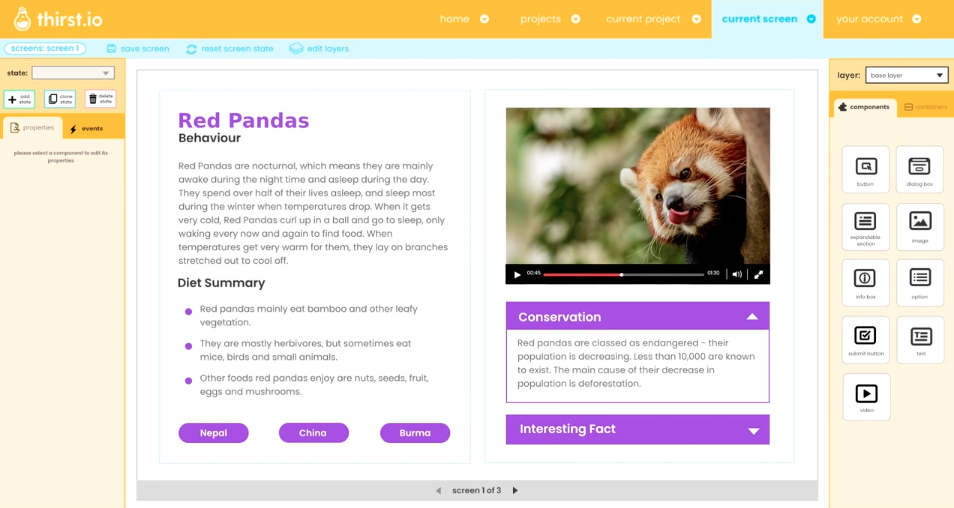
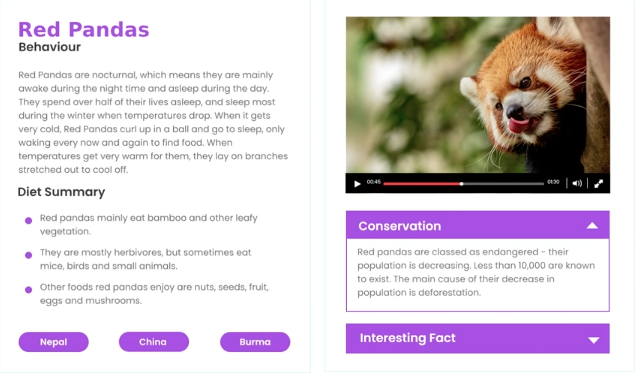
You can see our use of animated icons in our screen-captured video for Thirst.io:
Top Tip: Use nice graphics at the beginning of each of your videos. Nothing too fancy, just something with design elements that show the viewer you’ve put time and effort into making the videos look nice, thus communicating that the videos are important and worthy of their attention. It’s the difference between using Prezi vs Powerpoint to make a presentation. With a little bit of effort a prezi presentation can wow an audience who are used to bullet pointed power point slides.
This style of graphics would be used throughout all videos to ensure uniformity and a consistent look and feel.
Voice-Over Usage
The decision to use a voice-over artist or not will depend on the content being show in the video. Are the visuals enough that the viewer can easily understand what is going on? Is there on-screen text that could replace the use of a voice-over? Even with these two answers being yes, would a voice-over make the video more understandable?
The right voice-over artist can add another layer of humanity and reliability to your video. Be sure to choose voices that feel authentic and authoritative, but friendly. If your video runs on the longer side, you may consider using different voices. The narration can be more conversational, adding an entertainment factor. You may also consider using multiple voice-over artists if you have a video series. This is a memorable way to differentiate between each of the chapters.

Top Tip: Be sure your script is clear and as simple as possible without leaving out crucial detail. For example, if you needed to describe where to locate a button, you may say something like, “Click on the capacity tab, which is the first link in the left navigation menu.” You may also consider using a temporary voice-over (this could be yourself recording) in your video before hiring a voice-over artist. This give you an inexpensive method to text different scripts or amendments.
Using Animation
Annotations that add a colour or help to emphasise important aspects of the video can be very useful. A pen drawing on screen in a bright colour is one example – this may circle, highlight, or underline a particular piece of information. These annotations can be tremendously helpful for directing the viewer’s eyes to where you want them to go. ]
Top Tip: Use a combination of visual and verbal cues in your screen capture. Wherever something is highlighted with an animation or motion graphic, also mention it in the voice-over. Also, limit mouse movements. Excessive mouse movements are distracting to the viewer and can take away from the key points you are trying to convey.
You may consider using animation to increase the size of the mouse or curser when it is in use. This will make it easier for the viewers to follow onscreen actions as we move the mouse around the screenWhen we do see the mouse or the cursor, we would increase it’s size. This will make it easier for viewers to follow onscreen actions as we move the mouse around the screen.
Other Tips
Subtitles are another recommended addition – ones that can be toggled on and off. They are good to have for people who may be hearing-impaired or who don’t have access to headphones or speakers. However, as the subtitle text may obscure some of the screen captures, it’s good to have the option for them to be removed.
During the introduction to each video, you may consider outlining to the audience what they will learn. This will help them navigate to the correct video if you have a series.
Wrap-Up
There you have it – a plethora of tips and tricks on how to make the best screen recording. Planning ahead and getting to grips with the desired outcomes will save you much time in the long run – like they say in the building industry, measure twice, cut once. Keep your actual screen recordings clear and simple, with a length long enough to understand but short enough to retain attention. Consider using motion graphics or icons to add interest and help with memory retention. Ensure your voice-over is concise and compliments the video rather than adding confusion. Follow these tips for making a great screen recording, and you’ll end up with a video you can be happy with.